EcoGuide · Air Sealing · Updated 2026-10-26 · 1,400 words
Door Weatherstripping: Find the Draft, Then Pick the Right Seal
The Short Answer
A draft at an exterior door almost always comes from one of three places: the gap under the door, the gap between the door and the jamb on the sides and top, or a worn threshold. Each has its own fix, and the materials are inexpensive. The trick is matching the seal to the gap instead of buying one product and hoping.
Weatherstripping is part of air sealing. The EPA estimates that sealing air leaks and adding insulation together can save an average of 15% on heating and cooling costs. That figure covers the whole house, attic and basement included, so a single door is a small slice of it. What you notice first is comfort: no cold strip of air across the floor.
Step 1: Find Where the Air Gets In
Do these on a cold or windy day, with the door closed and latched.
- Look for daylight. ENERGY STAR’s rule of thumb: where you see light shine through, that spot has an air leak. Check the bottom corners and along the latch side.
- The paper or dollar-bill test. The Department of Energy’s Building America guide says to close the door on the bill; if it pulls out easily, air is probably leaking there. Repeat every foot or so around the frame.
- The incense test. ENERGY STAR suggests you light an incense stick and move it slowly around the edges. If the smoke is pushed one way or the other, you have found a leak.
Mark each leak with painter’s tape. Most doors leak in more than one place, and the bottom is usually the worst.
Step 2: Match the Seal to the Gap
The Department of Energy’s Building America Solution Center lists where each type of weatherstrip belongs. Summarized:
| Type | Where it goes | Notes from the DOE guide |
|---|---|---|
| Door sweep | Bottom of the door: the inside face of an in-swinging door, the outside face of an out-swinging one | Easy to install; many are adjustable for an uneven threshold |
| Door shoe | Wraps the bottom of the door to seal the space beneath it | Sheds rain on the outside and is durable; may require planing the door bottom |
| Tension seal (V-strip) | Top and sides of the door, in the jamb | Durable, invisible when in place, very effective |
| Tubular rubber or vinyl gasket | Around the door, against the stop | An effective air barrier |
| Foam tape | Door frames and attic hatches | Durability varies; best where there is little wear |
| Fin seal (pile with a Mylar fin) | Sliding glass doors and aluminum sliding windows | Very durable |
Source: Building America Solution Center, Add Weatherstrip to Windows and Doors.
Two practical points. First, the Maryland Energy Administration warns that cheap open-cell foam tape becomes dry, brittle, and powdery, while vinyl and bronze tension seals and silicone gaskets hold up well, so spend the extra on the jamb seals of a door you use every day. Second, University of Missouri Extension notes that well-installed weatherstripping will be slightly compressed when doors and windows are closed. If the door is hard to latch afterwards, the seal is too thick.
Step 3: Fit It
- Start at the bottom. Measure the door width, cut the sweep to length with a hacksaw, and hold it so the flexible edge just touches the threshold with the door closed. Mark the screw holes, drill pilot holes, and screw it on. Open and close the door several times; it should drag lightly, not catch. Our sweep and draft-stopper picks are in best door draft stoppers.
- Then the sides and top. Clean the jamb or door stop with rubbing alcohol and let it dry. Fit V-strip on the hinge side and foam or a rubber gasket on the latch side and head, pressing it on in short lengths rather than stretching it.
- Check the threshold. Many exterior thresholds have adjustment screws under caps. Raising it a turn at a time can close a gap the sweep cannot reach. If it is cracked or worn flat, replace it.
- Re-test with the paper or incense method and fix what is left.
The DOE guide also says to look for worn or missing weatherstripping on all your windows and exterior doors. Doing them all in one session is efficient, because you have the tools out.
Don’t Skip the Door to the Garage
If you have an attached garage, the door between it and the house matters for health as well as heat. The DOE notes that car exhaust contains combustion pollutants such as carbon monoxide and benzene, and its guidance is to use weather stripping or an equivalent gasket on every door between living space and the garage. The weatherstrip guide calls this door especially important.
Treat it like an exterior door: a gasket on the sides and head, and a sweep or automatic door bottom at the floor. Keep any self-closing hardware in working order.
Renters and Doors You Can’t Modify
A fabric draft stopper laid along the bottom of the door needs no tools and leaves no marks. It works only while it is in place and does nothing for the sides, but it is the quickest relief for a drafty rental. Ask the landlord about a sweep; it is cheap, permanent and helps their heating bill too.
What We’d Buy
Pick by the gap you found, not by tier. A typical exterior door needs a sweep and one roll of jamb seal.
We may earn a commission if you buy through these links, at no extra cost to you. Products are chosen on published specifications; we do not test them in-house (how we choose).
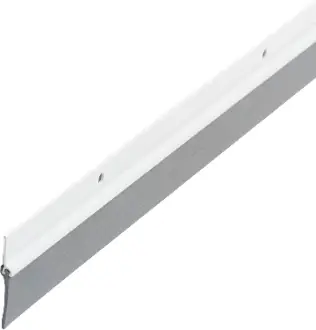
MD Building Aluminum & Vinyl Door Sweep (36 in)
For the gap under the door. Screws on, screws included; cut to width with a hacksaw.
Check price on Amazon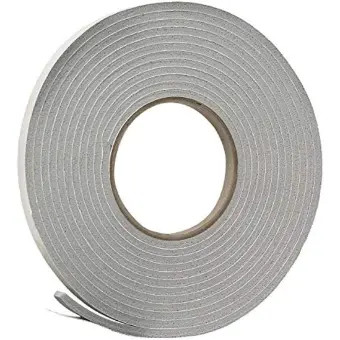
Frost King V443/4 Vinyl Foam Tape (4-pack)
For the latch side and top of the frame. Closed-cell vinyl foam; four 17 ft rolls cover several doors.
Check price on Amazon
Holikme Door Draft Stopper
No-install option for renters. Covers the bottom gap only.
Check price on AmazonFree: Home Energy Audit Checklist (PDF)
A two-page, room-by-room checklist for finding air leaks, standby power and heating and cooling waste yourself, in the order that pays back fastest. Get it now, plus new fix guides by email. Unsubscribe any time.
By signing up you agree to receive emails from EcoHome Intelligence. See our Privacy Policy.
Frequently Asked Questions
How do I know if my door needs weatherstripping?
Look for daylight around the edges, close the door on a sheet of paper or a dollar bill and see if it slides out easily, or move a lit incense stick around the frame on a windy day. Any of those means air is getting through.
What is the best weatherstripping for an exterior door?
Use a sweep or door shoe for the bottom and a durable jamb seal for the sides and top: a V-strip tension seal or a rubber or silicone gasket. Cheap open-cell foam wears out quickly on a door used every day.
Should the door be hard to close after weatherstripping?
It should close with slight compression of the seal. If you have to force it to latch, the material is too thick or the sweep sits too low.
How much does weatherstripping a door save?
No reliable source gives a per-door figure; it depends on how leaky the door is, your climate and your heating fuel. The EPA estimates an average 15% saving on heating and cooling from air sealing a whole house and adding insulation.
Do I need to weatherstrip the door to an attached garage?
Yes. The Department of Energy recommends weatherstripping or a gasket on every door between the house and an attached garage to keep car exhaust out of the living space.
What weatherstripping works on sliding glass doors?
Sliding doors use pile weatherstrip in the track. The DOE guide recommends fin seal, pile with a plastic fin in the middle, which it rates as very durable.
Related Guides
- How to find thermal leaks — the rest of the house
- Drafty basement air sealing — the rim joist and basement door
- How to seal the attic hatch — the other door most homes forget
- Home energy audit checklist — a two-page printable
- Best door draft stoppers and window kits — sweeps, stoppers and film compared
Sources
- Building America Solution Center (DOE): Add weatherstrip to windows and doors
- Building America Solution Center (DOE): Attached garage
- ENERGY STAR: DIY checks and inspections
- ENERGY STAR: Methodology for estimated savings
- Maryland Energy Administration: Weatherstripping
- University of Missouri Extension: Weatherstripping (EM101)
